How to Upload a Hand Coded Website to Siteground

DISCLOSURE: This post may contain chapter links, significant when you click the links and brand a purchase, we receive a committee.
In that location are a lot of situations where you need to upload files to your web hosting account. If y'all desire to migrate your old website to a new web host then y'all need to manually upload the files get-go. Over again, you lot might need to upload themes, plugins, modules etc. to your existing website.
And then, it is amend to know how to upload files to your web host. If yous are a SiteGround web host user who is searching for this specific tutorial. Then we accept good news for yous. In this article, we will tell yous how to upload single files and also entire websites to a SiteGround web host.
Equally always, nosotros volition also add screenshots to each pace. So, coil your sleeves. And, let'southward get to the main office.
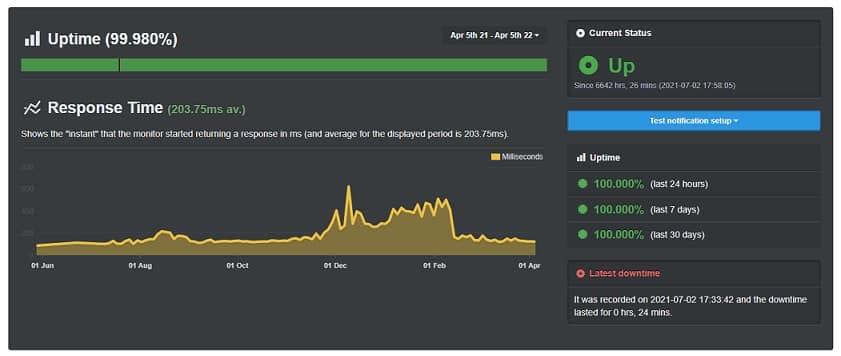
Our Top Ranked #1 Web Host
![]()
Latest Uptime Stats (Real Records) - 99.98% (Concluding 12 Months)
Visit Cloudways
Upload Website Files on SiteGround
Uploading files via SiteGround cPanel File Manager:
Commencement and foremost, we volition allow you lot know how to use the cPanel 'File Manager' role to upload files. So, allow's encounter.
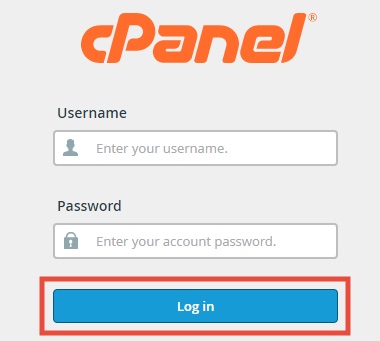
- Log in to cPanel dashboard of your SiteGround web host account
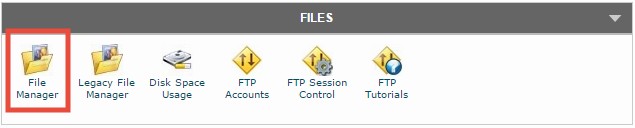
- Now, scroll down until you lot discover the 'Files' section. Under this section, you will find the 'File Manager' button. Click on the 'File Manager' button
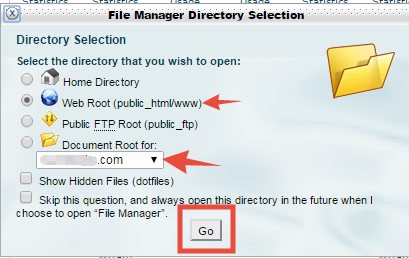
- In doing so, a new popup window volition appear. You have to choose the particular domain name from the drop-down carte du jour to which you want to upload the files. Commonly, if you have only 1 domain so it volition be selected by default. Too, you lot accept to choose the 'Spider web Root (public_html/world wide web)' folder; this is the default directory where y'all should upload the files to a website. Once again, it will be selected by default normally. If it does not then change it as nosotros showed in the screenshot below. After that click on the 'Get' push from the bottom to proceed
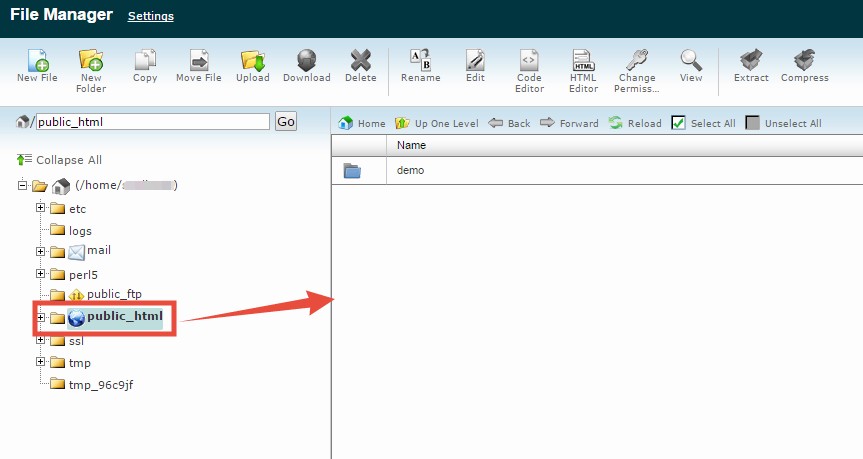
- Adjacent, a new tab will be opened. On the left-hand side, you will discover all of the folders. And on the left side of the screen, you will notice the files under whatever detail folders. Usually, you volition see that the 'public_html' folder will be opened automatically. And you need to upload any files to this very folder
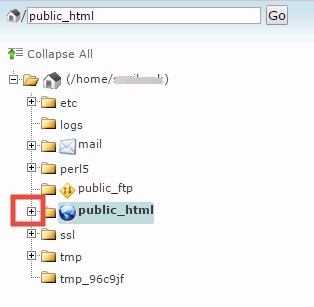
- Alternatively, if y'all want to upload files in sub-directory and so click on the '+' button next to the 'public_html' binder which will bring out the sub-directories. And then open the specific sub-binder to which y'all want to upload the files
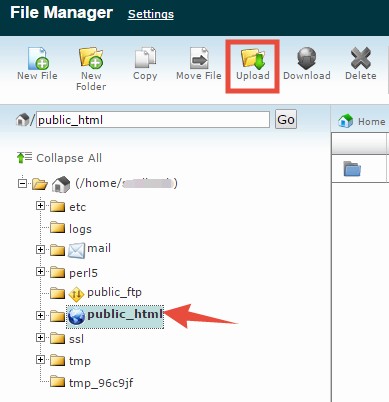
- However, we are going to upload the files to the 'public_html' folder as this is normally the default folder to host website files. So, click on the 'public_html' first to select it (the background will be highlighted which will confirm that the 'public_html' is selected). Then click on the 'Upload' button from the superlative bill of fare
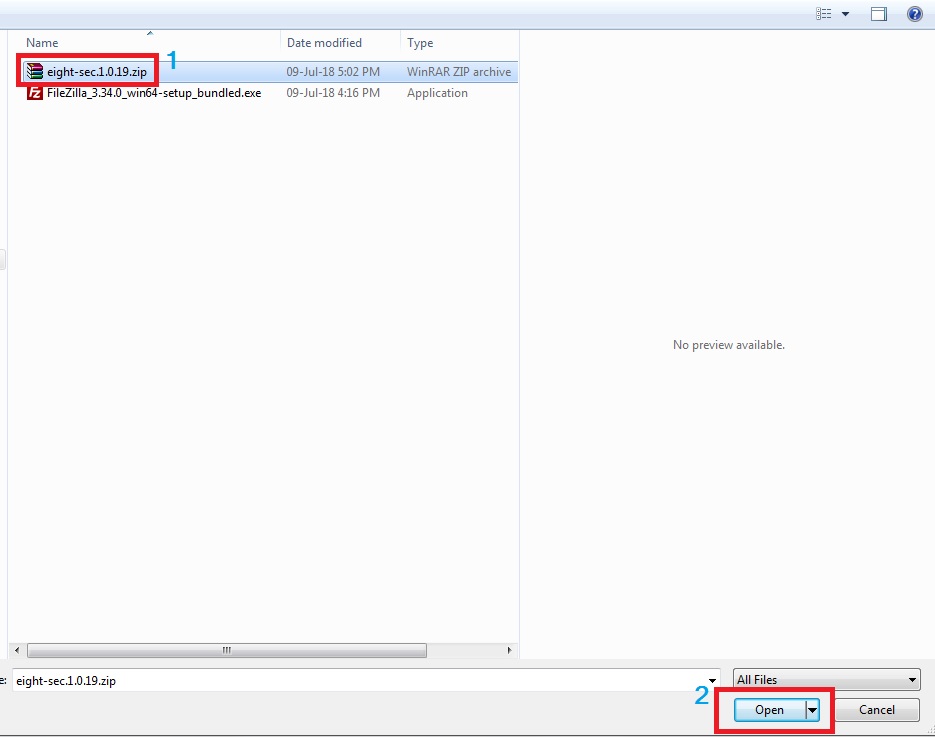
- Another new tab will exist opened. Click on the 'Cull File' button from that new tab
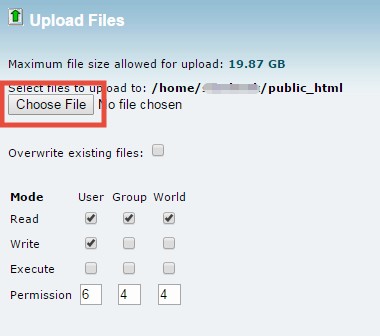
- Later on that, a new popup window will appear. Scan to the specific folder and select the file(southward) yous want to upload. And so click on the 'Open' push button from that window and the upload will exist started immediately
- If you look at the lesser correct corner of the screen, yous will see the progress of the upload

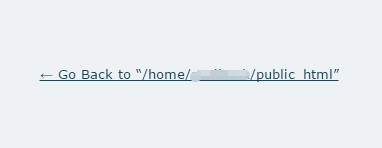
- Afterwards the upload is completed, click on the 'Go dorsum to "/home…' button to return to the previous page
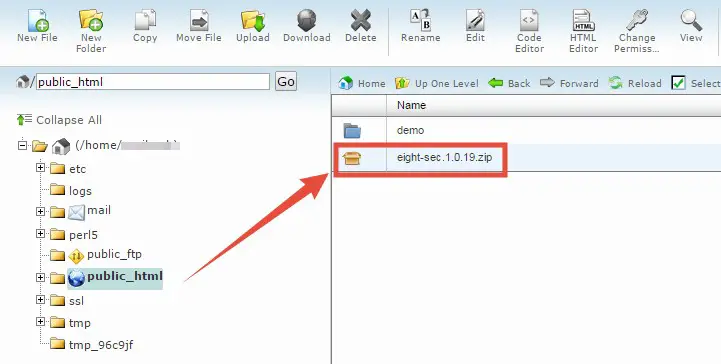
- On the previous page, you volition detect the new file was uploaded successfully
Congratulations. You lot take learned the method of uploading files using the built-in file manager of cPanel. This is a bang-up way to upload files which take a smaller size. Yous can attempt to upload bigger files using this method too. However, in some cases, some complications may arise. So, if y'all have a lot of files which are very big in size. This method may not come to your help. In that case, we don't recommend this method.
For example, if you need to upload an unabridged website then you should utilize FTP clients instead of using this previous method to practise that. Yous can follow the rest of the article to learn the method of using an FTP client.
How to use FTP clients to upload files:
In this part of the article, we volition talk virtually how to upload website files using FTP clients. If y'all are not familiar with FTP client software. Then y'all should read our detailed guide on FTP (File Transfer Protocol).
If you want to upload multiple bigger files at once then you should utilise this method. There are a lot of advantages using an FTP software. Yous can pause/resume the upload using this method. Also, if y'all have a slow net speed, then this can be very helpful for you.
There are a lot of FTP customer softwares. Some of them are paid and too some are free of cost. Usually, the paid software come up with more features than the free ones. But, if y'all are trying to merely upload and download files to/from a website then the free ones work just well.
There are also some browser extensions available which tin piece of work as FTP clients. Still, we do not recommend using a browser to upload files using FTP extension. Because this procedure is very slow and your browser might crash at some bespeak. So, allow's see how to upload files using FTP clients.
For the purpose of this article, we will show you how to utilize 'FileZilla'; an FTP software which is free and compatible with all of the major operating systems. Information technology is besides a cross-platform software. You can always use any other software if y'all want to. The whole arrangement will be somewhat similar to this method fifty-fifty if you use other software. But, as FileZilla is the most popular one we will use that software to demonstrate in this article.
Nosotros will separate this method into three parts. And so that you can follow the entire method in stride by pace. Let's go.
Part 1. Creating an FTP account on the SiteGround cPanel:
Before you lot do anything else yous need to create an FTP account.
- Log in to the cPanel of your SiteGround hosting account
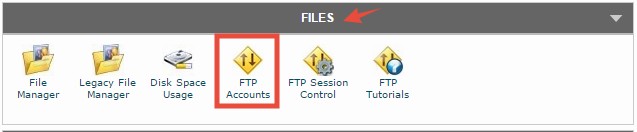
- So scroll downwards to the 'Files' department and click on the 'FTP Accounts' button to proceed
- On the adjacent folio, you will find the 'Add together FTP Account' section where y'all have to enter some information to create an FTP account. Nosotros will now tell you what to enter to each of the boxes
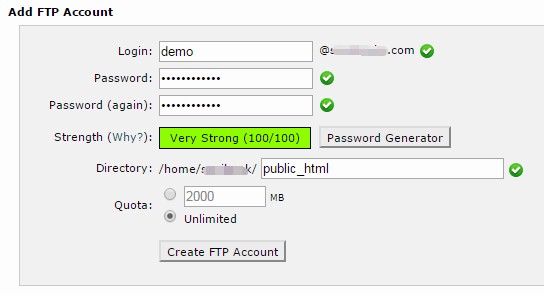
- Login: You can write annihilation hither. We have used 'demo' as it will be a demo business relationship
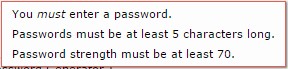
- Password: You have to enter a strong password hither. Your countersign must have at least 5 characters. And the password forcefulness must be at least seventy. You lot volition see a password strength indicator below the countersign
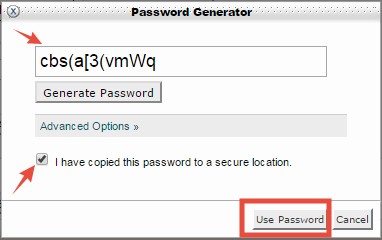
- If yous can't create a valid password. Then click on the 'Password Generator' button which volition bring out an automatically generated password. Now, yous accept to copy the password and save information technology to someplace condom. You will need this countersign a lot of times later. And so click on the 'I have copied…secure location' button. Side by side, click on 'Use Password' button. That will automatically identify the password in the respective box

- Directory: The directory should be 'public_html'
- Quota: This should be 'Unlimited'

- After you are satisfied with all of the information yous accept provided, click on the 'Create FTP account' button

- Instantly, the business relationship will be created. You will see a notification saying 'Account Created' on the screen

- And you will find the account is listed under the 'FTP Accounts' section

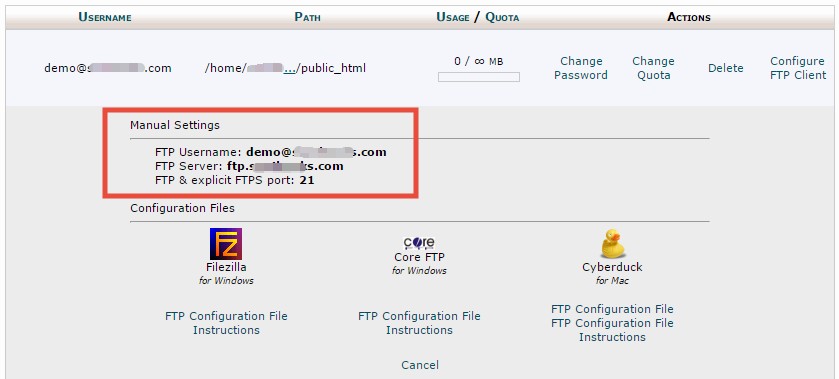
- Practiced to know: If y'all desire to know the detailed configuration data most whatever particular FTP account. So click on the 'Configure FTP Customer' button which volition bring out the important information about that business relationship

- Those useful information will be under the 'Manual Settings' section
As you accept created a new FTP account. Now, we will describe how to connect the web server to your computer using this FTP business relationship downward beneath.
How to use 'FileZilla' to upload files:
- Kickoff, Download 'FileZilla' on your PC (according to your operating system) from the official website
- Then install it in your PC and run the software
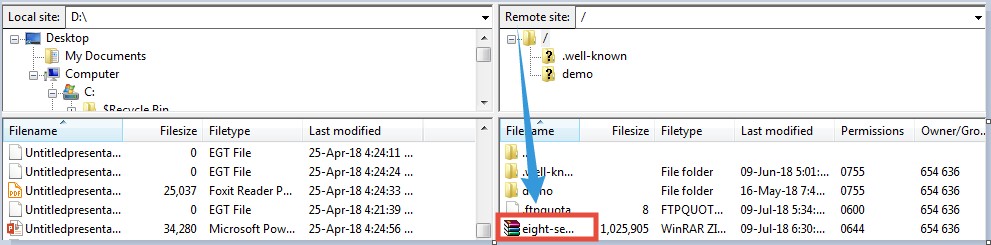
- The user-interface of the software will be like the image below. On the left-hand side, y'all will run across the files of your computer. And on the right side of the screen, yous will find the files of your web server

Now, you demand to connect your PC using this software to your spider web server. Yous can connect in two dissimilar ways. Nosotros will prove yous both of the means to do that. You can follow any one of them. Let's begin with the outset i.
Part 2. Establishing the connectedness between your PC and web server:
#1. Connect using 'Quickconnect':
- The 'Quickconnect' bar will exist at the top of the screen under the menus

- You lot have to enter the 'Host, Username, Countersign and Port in their respective places before you lot can use the 'Quickconnect' feature
- If yous don't know this information, you volition notice them nether the 'FTP Accounts' department on your cPanel account. Then log in to the cPanel and click on the 'FTP Accounts' push and then click on the 'Configure FTP Client' push. You will find all of the required information under the 'Transmission Settings' department
- Then, now you tin can fill in the blank boxes with appropriate information. First, the 'Host' will be similar to the 'FTP Server'

- So the 'Username' volition be similar to the 'FTP Username'

- The 'Password' would be the one y'all set when you were creating the account. We have told y'all to relieve that password. So, recollect the password from the safety identify and paste it there

- Lastly, the 'Port' volition be 21 by default

- Afterwards that, you have to click on the 'Quickconnect' push button

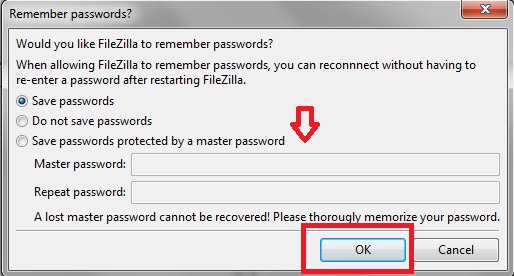
- In doing so, a new popup window volition appear. If you lot want to save the password for time to come and so clicking the 'OK' push button to go along. You can besides use a master password but we don't recommend using that feature. As if you forget/lose the master password, it tin can't exist retrieved
- Another pop-up window volition announced. Add a check-mark next to the 'Always tryst certificate in time to come sessions' choice. And, click on the 'OK' push to continue

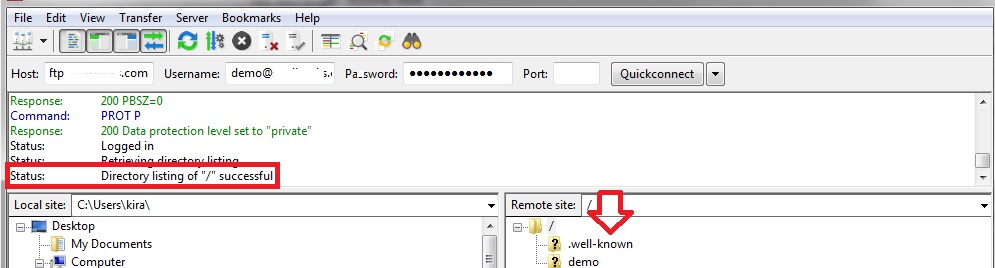
- Shortly, the connection between your PC and the web-server will be established. You will encounter the 'status' equally successful. And forth with that, y'all will notice some new folders have appeared on the correct-paw side of the screen nether the 'Remote Site' section, which ways the connection is established
This method is effective if you are in a hurry. But, in that location is another method of connecting to your spider web server using 'FileZilla'. In the adjacent section, we will talk about that. Y'all tin can follow either of these methods to connect to your spider web server.
But, if you use this second method, the software will remember all of the data you lot volition provide prior to connecting. So, y'all won't have to enter the data (username, password etc.) every fourth dimension y'all want to connect.
#2. Connect using Site Director:
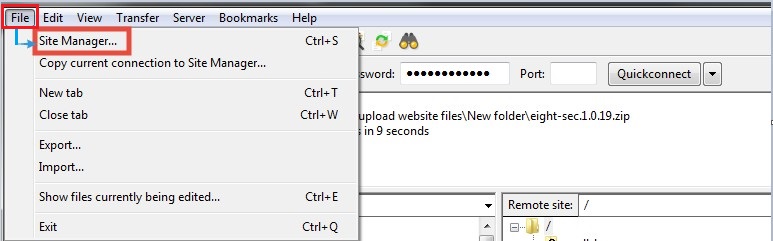
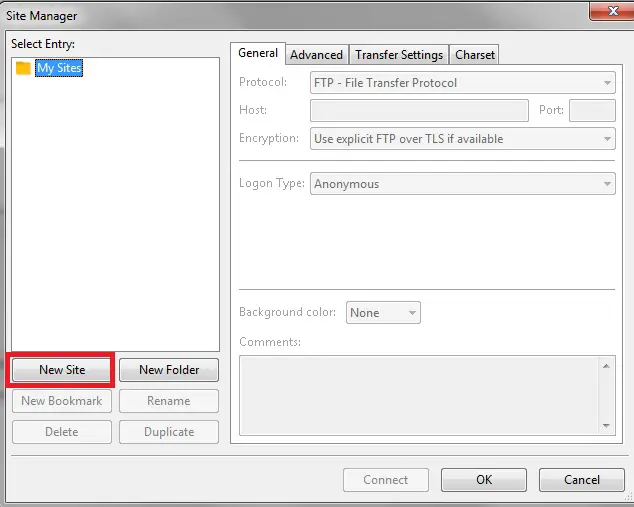
- From the 'FileZilla' software, Click on the 'File' push from the top menu. Then from the new sub-menu click on the 'Site Manager' push
- A new window will appear. Click on the 'New Site' button from the left pane
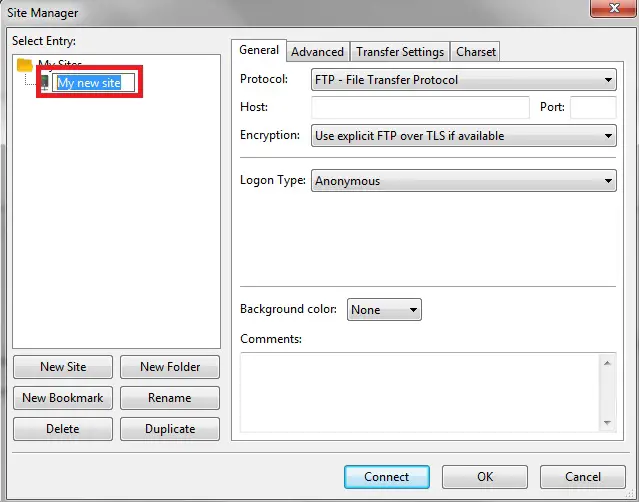
- Then blazon a name in the box on top of the screen. We accept used 'My new site' as the proper noun
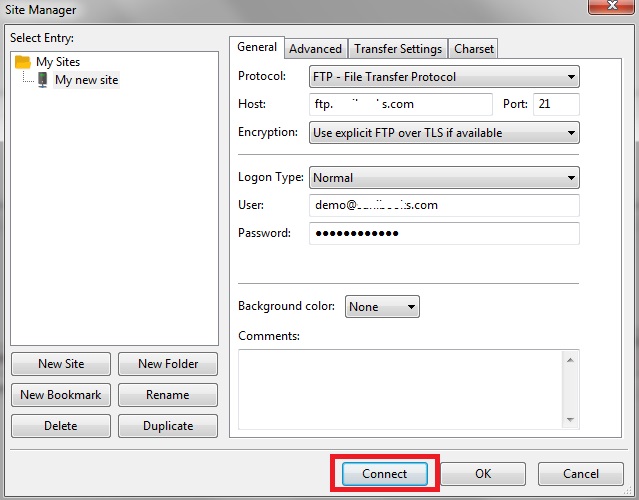
- Then on the correct side of the screen, you have to set some settings/options. First, click on the 'Logon Type' choice and select 'Normal' from the driblet-down menu

- The 'Protocol' should be the default one which is 'FTP…'
- The 'Encryption' should exist the default one which is 'Use explicit FTP over TLS if available'
- The 'Port' should exist 21
- The 'Host' should be similar to the 'FTP Server'. So copy that and paste in the blank box
- The 'User' would be the 'FTP Username'
- As usual, the 'Password' would be the one you used when setting upwards the FTP business relationship in the first place
- Finally, click on the 'Connect' button to proceed. The connection will be made inside a few seconds. And yous will be able to upload files after that
As you have learned how to connect to the web server using the 'FileZilla' software. Now, you volition acquire how to upload files using 'FileZilla'.
Part three. How to upload website files:
- We assume that you have already established a connexion between your PC and the web server
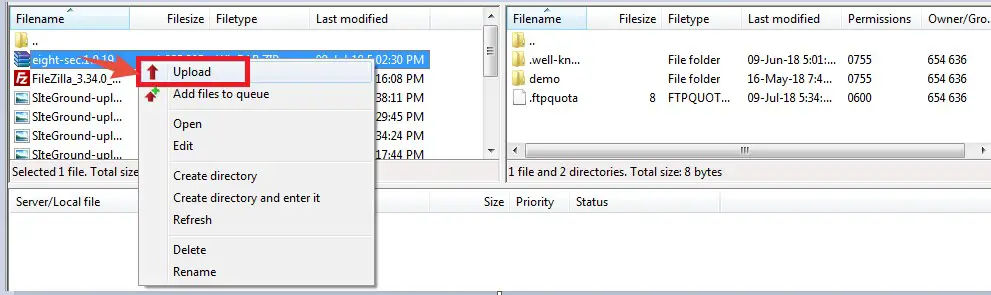
- Now, every bit you know that the files of your computer are listed on the left side of the screen, right-click on the files you want to upload. And so click on the 'Upload' button to commencement the upload process.You lot can besides simply drag the file from the left-hand side of the screen and so driblet it to the correct-hand side of the screen to upload via drag and drib function. Additionally, you can upload multiple files if you desire to. Merely, select the files which you want to upload past holding the CTRL/COMMAND key on your keyboard. Then similarly, right-click on the file(southward) and click on the 'Upload' button. Or, simply drag and drop the files from the left pane to the right pane
- You volition see the upload is in progress on the bottom of the screen

- After the upload is completed, yous volition find the files are already available under the 'Remote Site' department; which means the upload procedure is successfully completed
That's information technology. Now, you know how to use FTP clients to upload files to the SiteGround web host.
Cartoon the conclusion:
Uploading a file(s) to whatever website is pretty easy nowadays. Nosotros promise this commodity will make the state of affairs easier for you in the future. If you follow this article and then y'all won't have whatsoever problem uploading any type of files. If this article helps you, don't forget to share it with others.
Source: https://www.reviewplan.com/siteground-upload-website-files-tutorial/
Publicar un comentario for "How to Upload a Hand Coded Website to Siteground"